
After you register, the portal walks you through connecting your Microsoft 365 organization and creating your first backup job.
Before you begin
- Register for a VMOBACKUP account.
- Sign in to Microsoft with a Global Admin account for your Microsoft 365 organization.
- Decide on a repository password and keep it somewhere safe, like a password manager.
Add your Microsoft 365 organization
Sign in to Microsoft 365
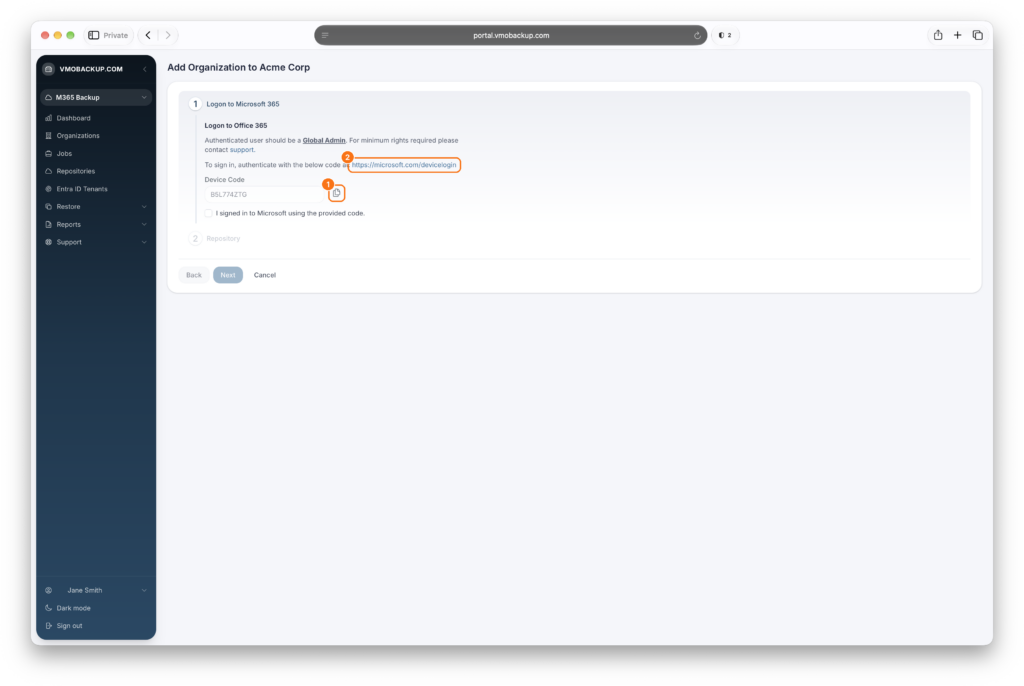
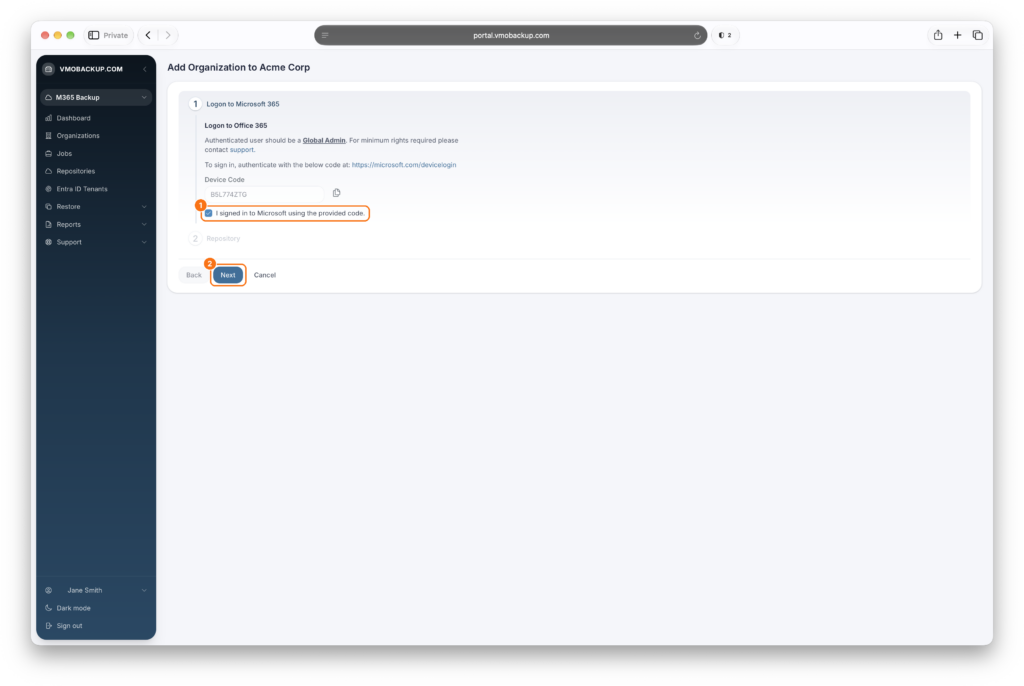
- Click the copy icon next to the Device Code.
- Open the link https://microsoft.com/devicelogin.
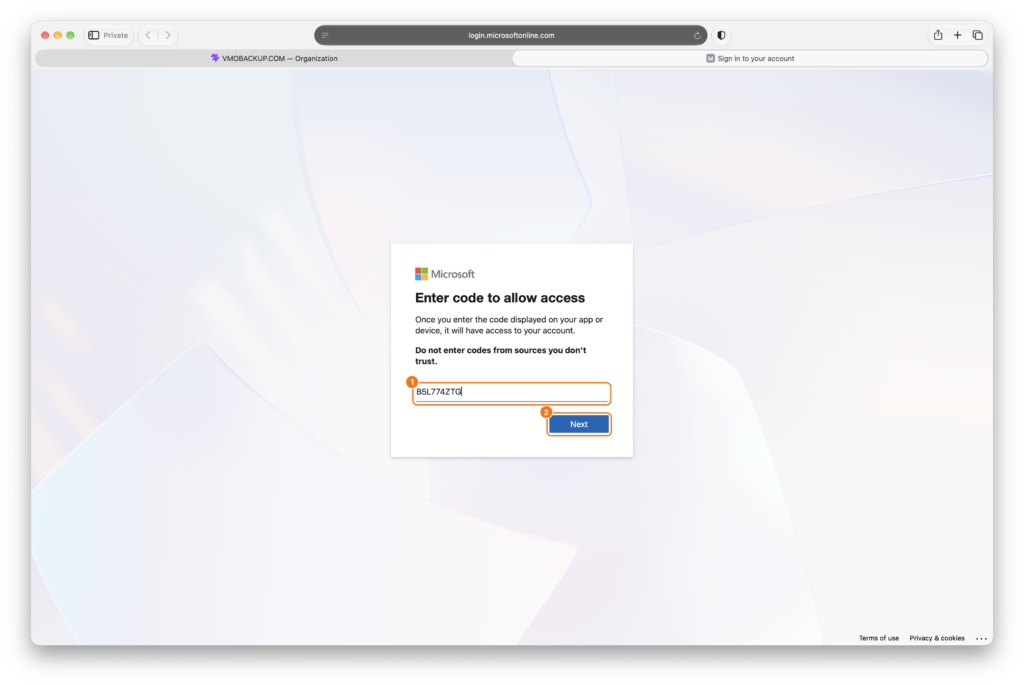
- Paste the code and click Next.
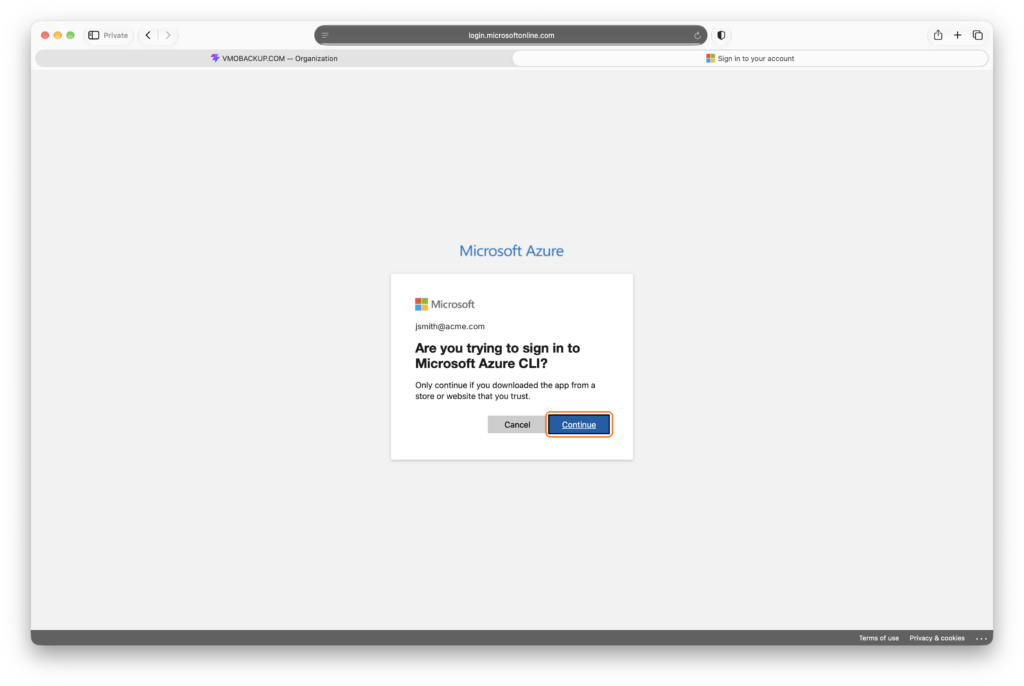
- Sign in with your Global Admin account. Microsoft asks if you’re trying to sign in to Microsoft Azure CLI. That’s expected, since VMOBACKUP uses Microsoft’s device sign-in. Click Continue.
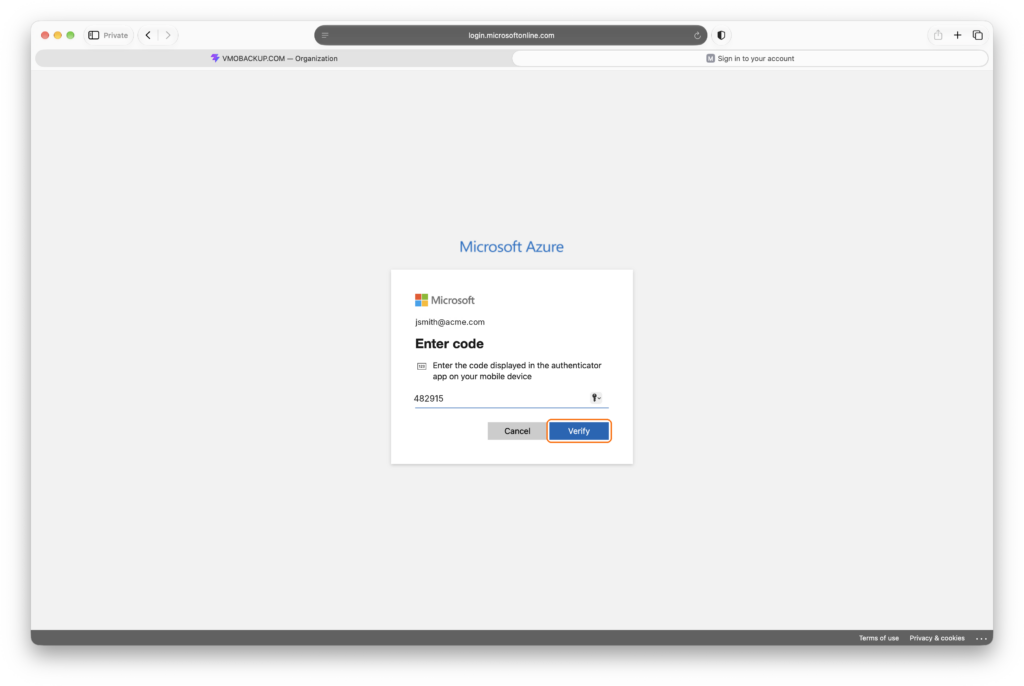
- If your account uses multi-factor authentication, enter the code from your authenticator app and click Verify.
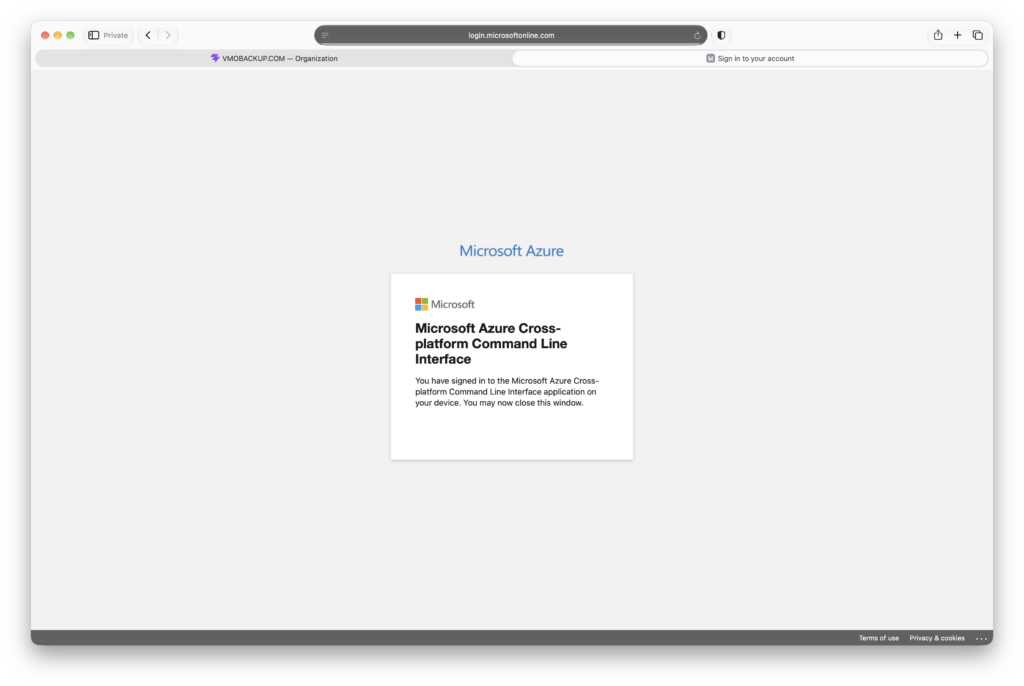
- When you see that you’ve signed in, close the Microsoft window and go back to the portal.
- Check I signed in to Microsoft using the provided code, then click Next.
Set your repository password and retention
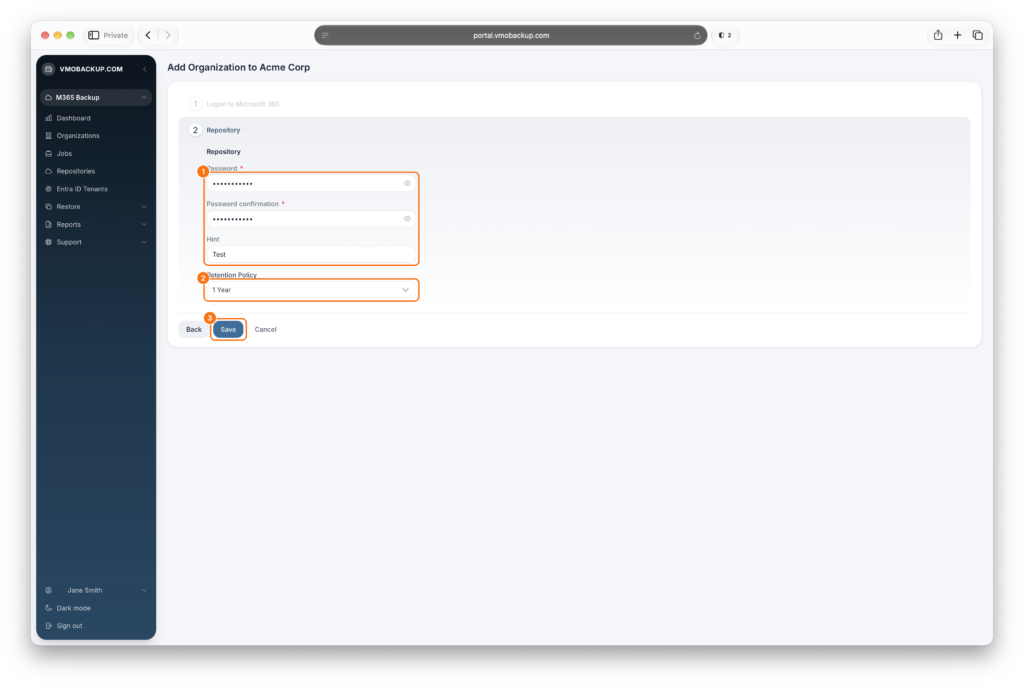
- Enter a Password, confirm it, and add a Hint to help you remember it.
- Choose a Retention Policy, which is how long your backups are kept. The options depend on your plan.
- Click Save. You’ll see “Please be patient while we set up your Organization” while it finishes.
Important: This password encrypts your backups and only you have it. We can’t recover it if it’s lost, so store it somewhere safe.
When setup finishes, the portal takes you straight to creating your first backup job.
Create a backup job
1. Job name
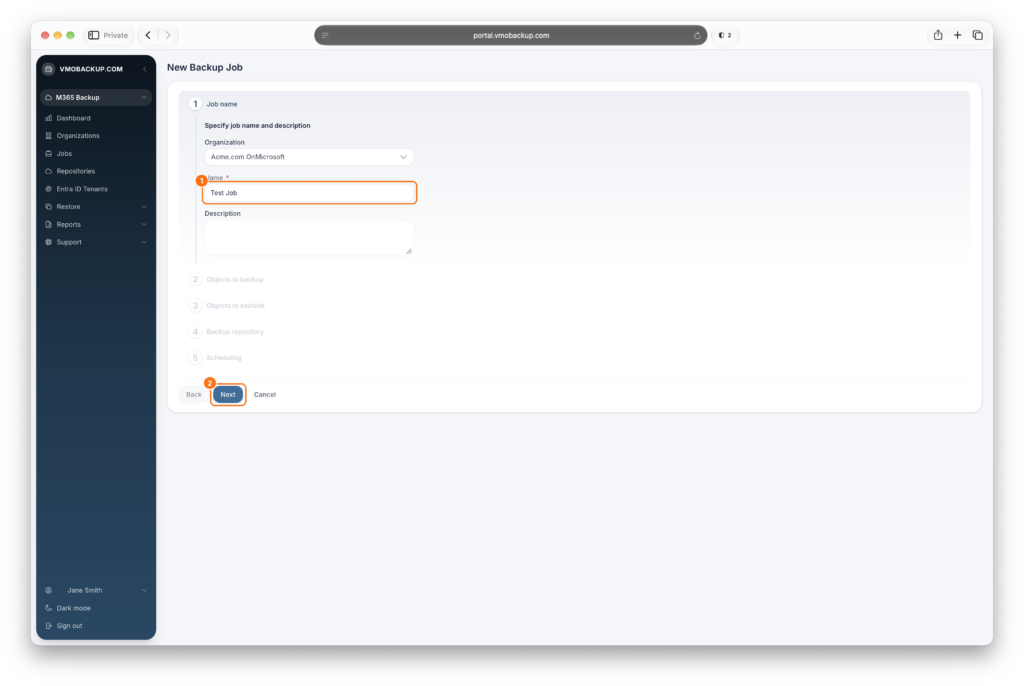
Your new organization is already selected. Enter a Name for the job, add a description if you’d like, and click Next.
2. Objects to backup
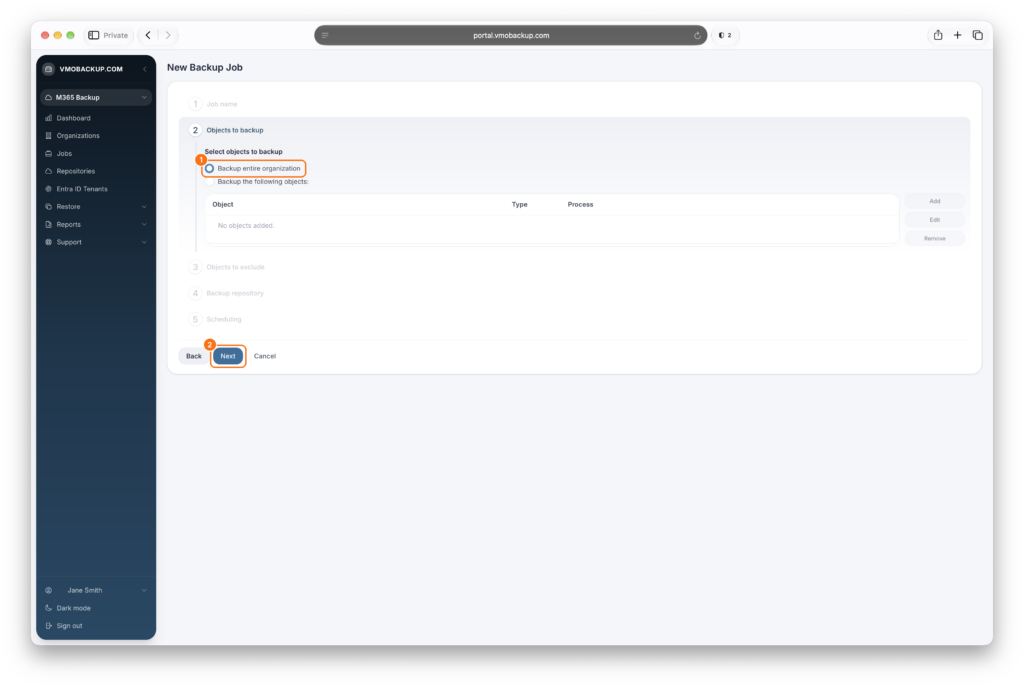
Choose Backup entire organization to protect everything, then click Next.
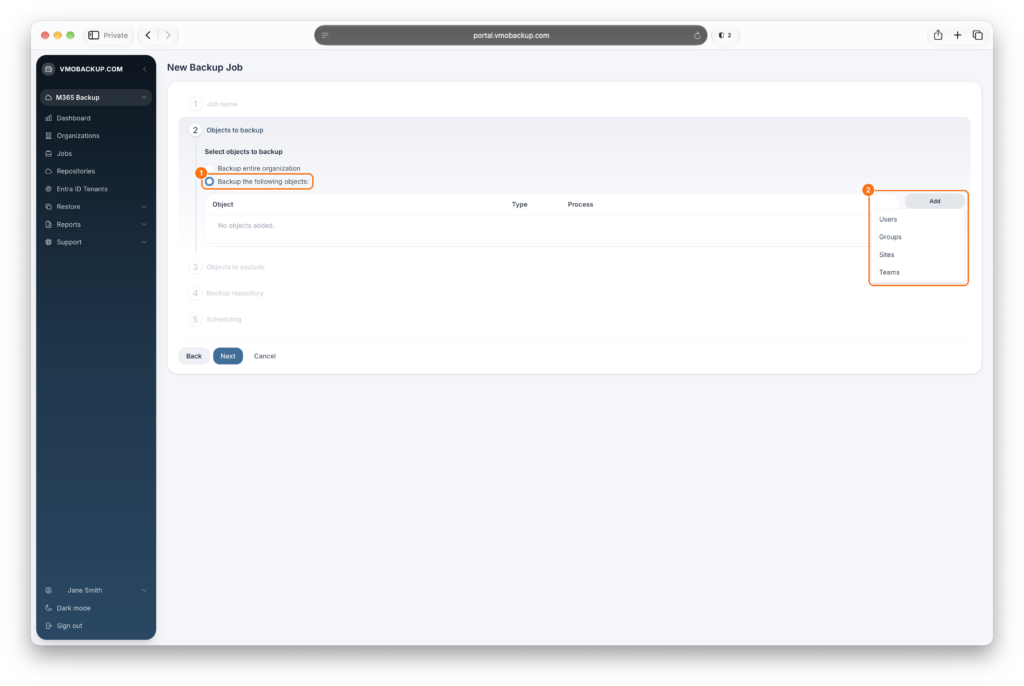
To back up only some things, choose Backup the following objects, click Add, and pick Users, Groups, Sites or Teams.
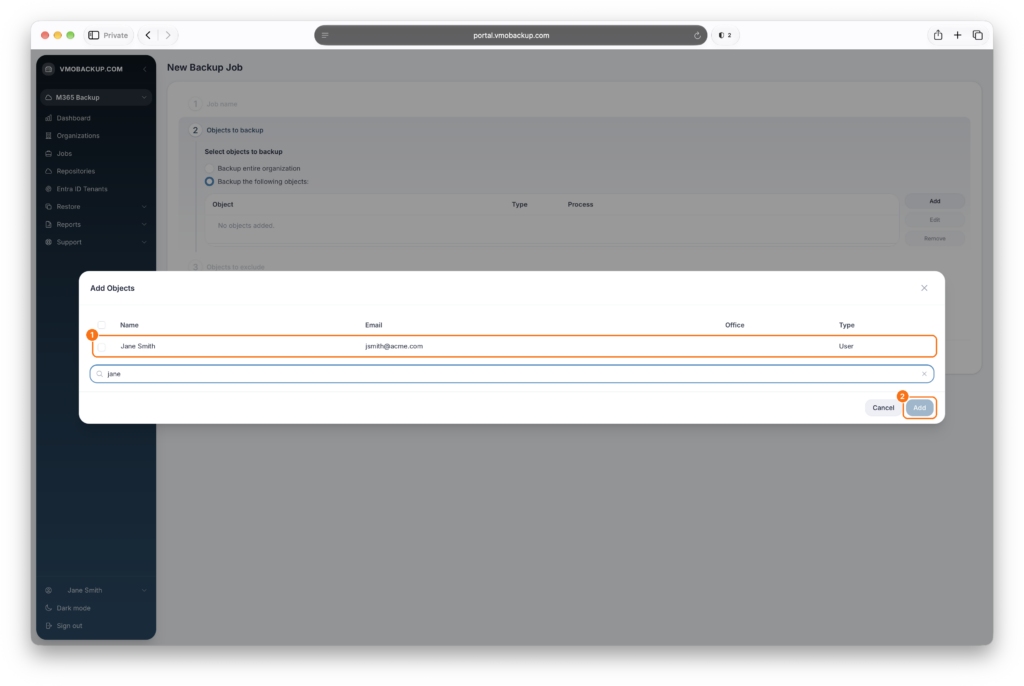
Search for what you want, check it, and click Add. Repeat for anything else, then click Next.
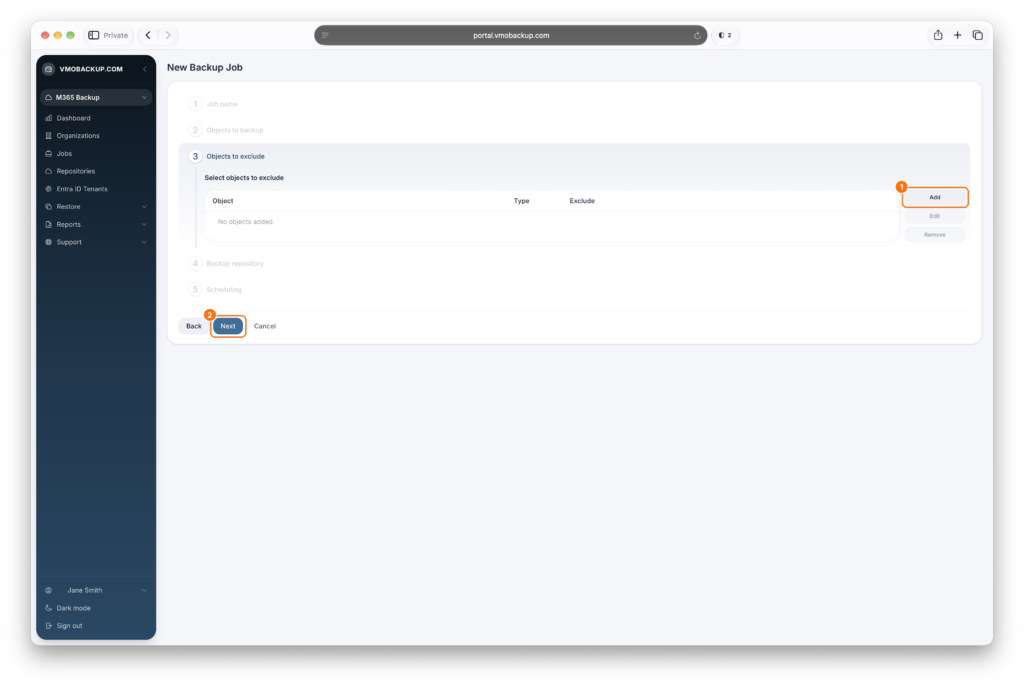
3. Objects to exclude (optional)
To leave something out, click Add and choose it the same way. Otherwise, click Next.
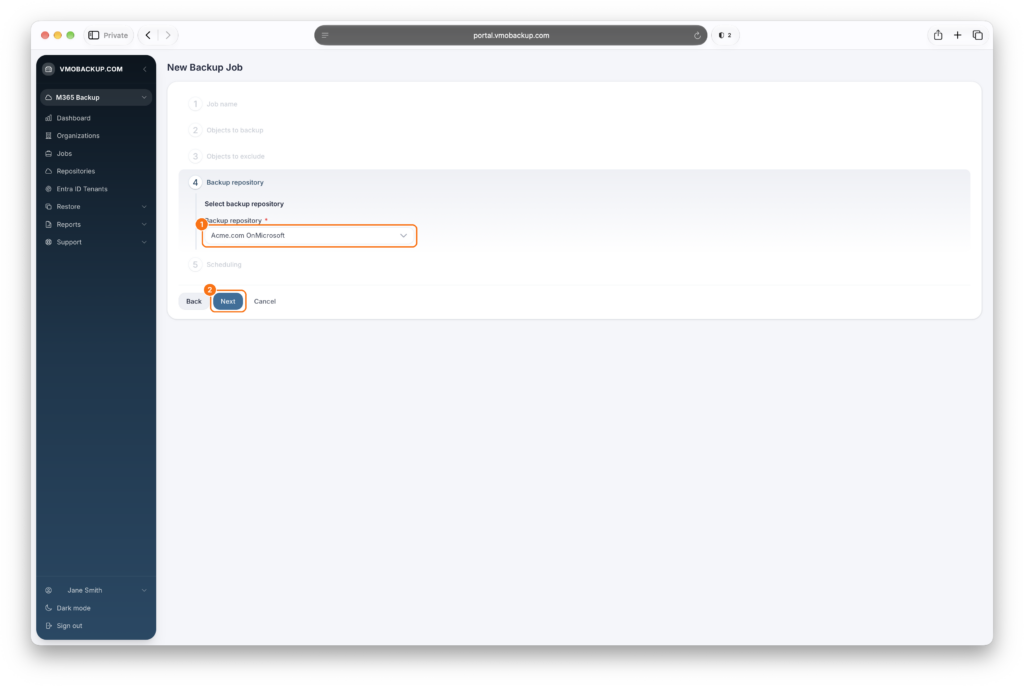
4. Backup repository
Your organization’s repository is selected for you. Click Next.
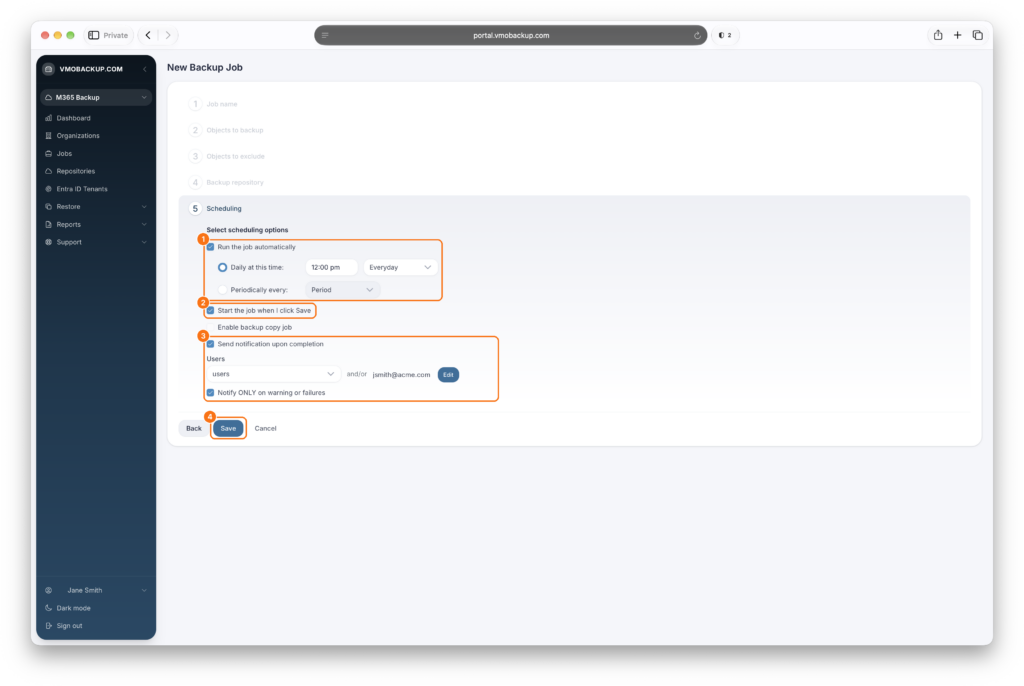
5. Scheduling
- Leave Run the job automatically checked. Choose Daily at this time and pick a time and days, or choose Periodically every and pick an interval. How often you can run backups depends on your plan.
- Check Start the job when I click Save to run the first backup right away.
- To get emails about the job, check Send notification upon completion and choose who receives them. Check Notify ONLY on warning or failures if you only want to hear about problems.
- Click Save.
You’ll be taken to the Jobs page, where your first backup starts.
Manage your backup jobs
On the Jobs page, choose your organization from the dropdown, then click a job to:
- View its logs and details
- Start or stop it
- Enable or disable it
- Edit or delete it